

Now that you have a few elements, images and text, under your belt, it’s time to organize them inside containers. Containers provide various ways of organizing elements inside them so you can create complex screen layouts. I’ll cover three of the most common ones in this article: fixed, vbox, and hbox.
This tutorial series does not expect any prior knowledge of Ren’Py screen language or coding. I recommend you start with Getting Started with Ren’Py Screen Language if you haven’t yet read it.
Vocabulary
Element – thing you’re displaying on a screen. Can be an image, text, a button, anything that goes in a screen.
Container – thing that organizes elements in some way. Usually contains multiple elements to organize them somehow.
Children – The elements inside containers are also referred to as the container’s children.
What is a container?
A container acts as a single “unit” of sorts, which can organize multiple elements like images and text inside of it. If you move a container, all of the elements inside of it (aka its children) are moved along with the container. However, the positions of the elements inside the container are relative to the size and position of the container itself, and NOT the screen as a whole (unless they’re not explicitly inside a container, in which case the screen acts as the container).
You can think of this the same way that containers work in real life – if you put a bunch of food into a glass container to put in your fridge, and you move the glass container into the fridge, the food comes with it (and isn’t left behind on the counter).
Pseudocode
In coding, we sometimes use something called pseudocode to demonstrate coding concepts without writing actual executable code. Pseudocode can come in many forms, but fundamentally it’s just half a step closer to actual code than regular language is. For example, consider the following actually-executable Ren’Py code:
default has_flashlight = False
label start:
    "You arrive at a fork in the road."
    menu road_fork:
        "Take the left path.":
            if not has_flashlight:
                "The left path looks very dark. You don't have a flashlight."
                jump road_fork
            else:
                jump cave_path
        "Take the right path.":
            jump forest_path
This is code you can literally plug into Ren’Py and run as-is. But what if you wanted to explain these concepts to someone who doesn’t understand coding, or you just want to get your ideas down without worrying about all the nitty-gritty details of the variable names and exact condition logic?
That’s what pseudocode is for. There isn’t a “right” or “wrong” way to write pseudocode, (unless you’re in a computer science class or doing a job and they enforce some kind of standard). Pseudocode of the above code might look like:
"You arrive at a fork in the road."
Choice - "Take the left path"
    If you don't have a flashlight:
        "The left path looks very dark. You don't have a flashlight."
        go back to the choice menu
    Otherwise: Go to the cave path script
Choice - "Take the right path"
    Go to the forest path script
None of this code is literally executable; you couldn’t put it in Ren’Py and run it like this. But it communicates the same idea, and you can later turn it into the above code. Similarly, you may see a lot of examples use <> and other such symbols to indicate “placeholder” values in code. For example, Ren’Py dialogue literally looks like:
e "This is some dialogue."where e is a Character and This is some dialogue is what the character says. Pseudocode might look more like:
<character> "<dialogue>"which illustrates the general pattern of how to write dialogue, though it is not literally executable.
With that in mind, we can look at some pseudocode illustrating the basic structure of a container.
Basic structure of a container
For every container in Ren’Py, the basic structure will look as follows – note the following is pseudocode as explained above, and can’t be run in Ren’Py as-is:
container:
    <container properties>
    <element1>
    <element2>
    <element3>
Where container is the name of the container you’re using (e.g. fixed, hbox, vbox, frame, grid, etc.), <container properties> represents where you would put any properties of the container, such as its size, position, or spacing (for boxes and grids), and <element1> and similar are the elements you’re placing inside the container (its children).
A real code example of the earlier pseudocode might look like:
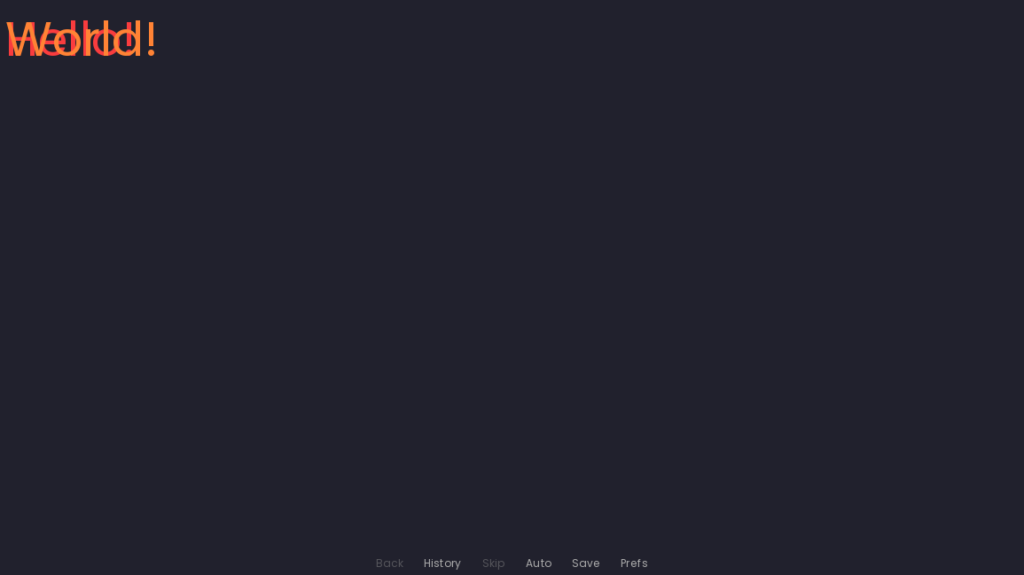
fixed:
    xysize (300, 400)
    pos (10, 10)
    text "Hello!" color "#f93c3e"
    text "World!" color "#ff8335"
fixed is the name of the container. xysize (300, 400) and pos (10, 10) are properties of the container (size and position respectively). text "Hello!" is the first element added to the container, and is thus behind the second element, text "World!".

Also of note in the above container pseudocode is the ordering of elements 1-3 inside the container. Because element1 is closest to the top of the code, it will be the farthest back, layer-wise. If you think of the container as a box and each element as a piece of paper, you first put paper1 into the box, then paper2, then paper3. If paper3 overlaps the other two papers in any way, paper3 will be displayed on top of them, because it was added to the box last. This is reflected in the real example, where “Hello!” shows up behind “World!”.
Fixed
fixed is what elements are organized inside of if a more specific container isn’t provided. You can think of it as just a generic box to put stuff inside. It doesn’t organize them in any particular way, but you can give it a size and move stuff around however you like inside it. As mentioned earlier, elements inside a container are positioned relative to the container itself, and not to the screen as a whole. That means you can put a bunch of elements inside a fixed and then move it wherever you want without disturbing the position of all the elements relative to each other inside the container.
That sounds a little confusing, so think of it like this: the fixed is a cork board. You put a bunch of photos (elements) up on the cork board. If you then move the cork board from one wall to another wall in your room, the photos stay on the cork board in the same positions as they were before you moved the cork board; it’s just the cork board that moved places.
Note that without further positioning properties, every element inside a fixed will simply end up one on top of the other, since the fixed does not organize them in any meaningful way.
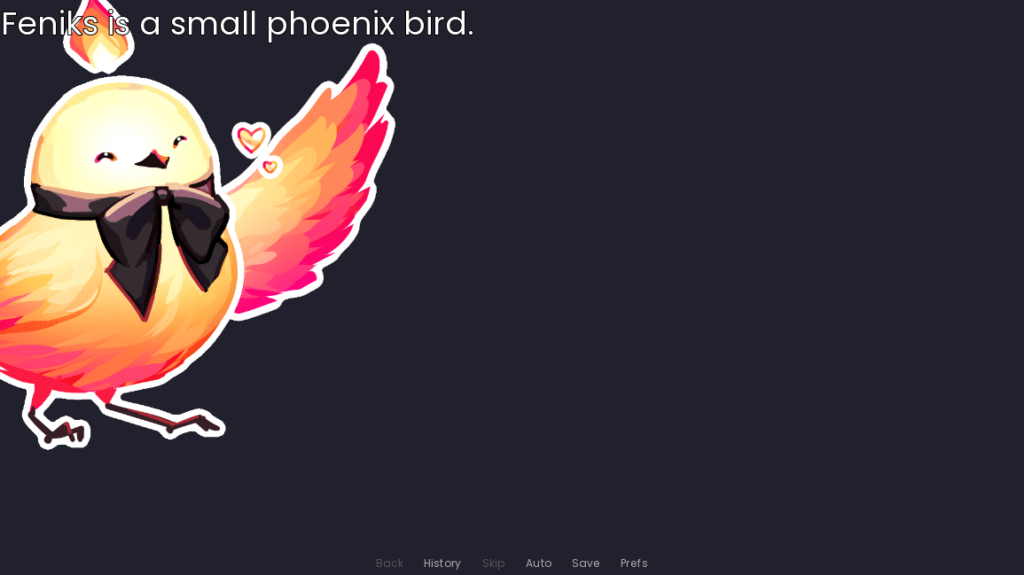
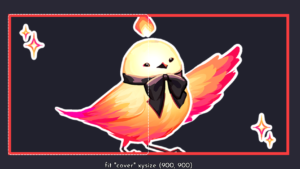
fixed:
    add "feniks heart happy cropped"
    text "Feniks is a small phoenix bird."
In the above example, the text appears on top of the image “feniks heart happy cropped”.
Vbox
Vbox stands for vertical box. Unlike fixed, it does organize the elements inside it. A vbox will organize its children by stacking them in top-to-bottom order according to the order they are added to the vbox in.
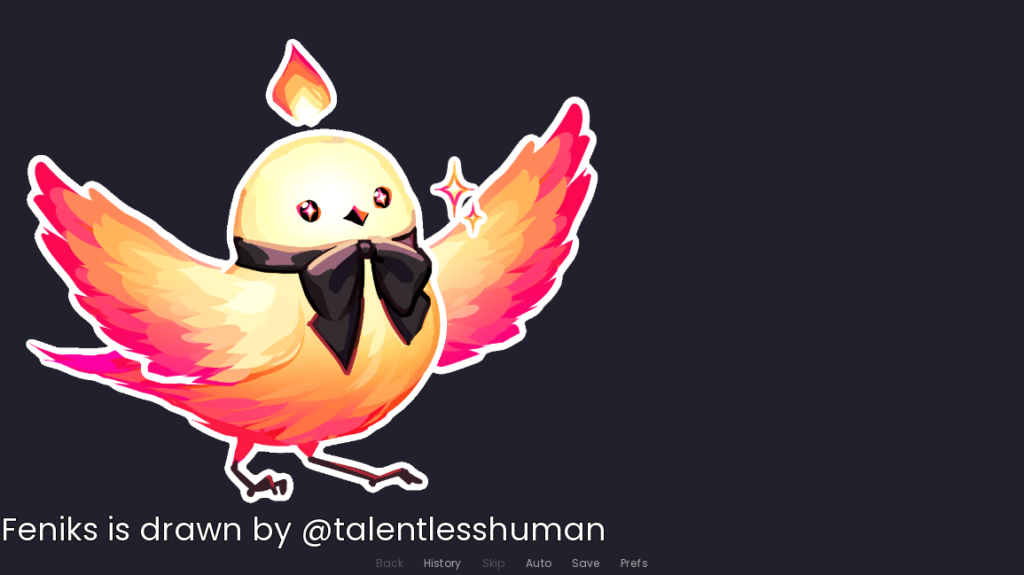
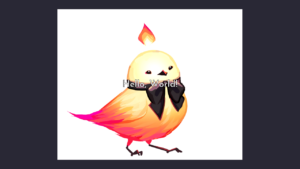
vbox:
    add "feniks sparkle excite up"
    text "Feniks is drawn by @talentlesshuman"
For this example, the image feniks sparkle excite up will be displayed above the text "Feniks is drawn by @talentlesshuman". By default, they will not overlap, but if they did (usually because you set the spacing between the elements to be negative), then the text would be on top of the image as it is for the fixed example earlier.
If you added more elements to the vbox, they would appear below the text as well. For example:
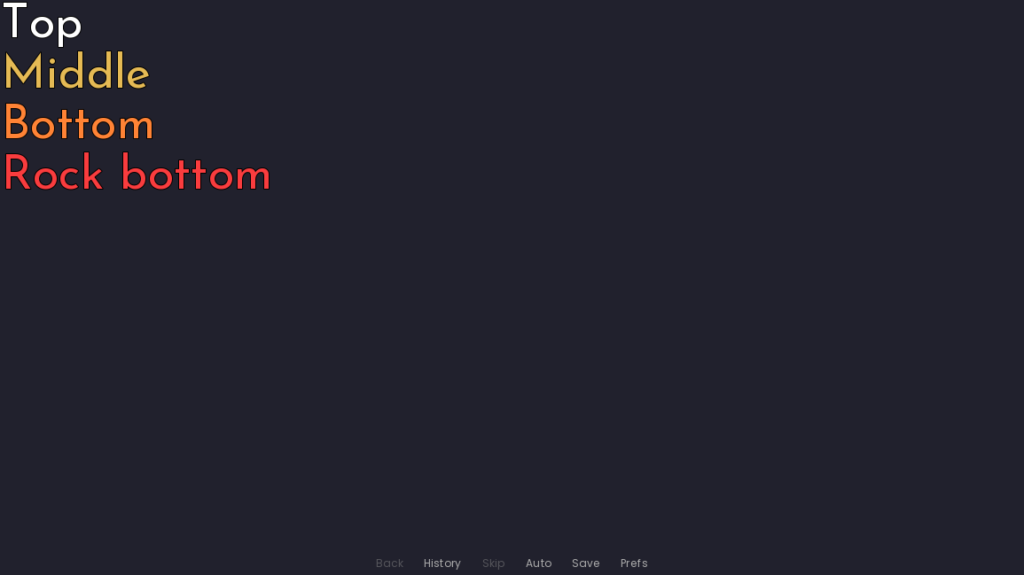
vbox:
    text "Top"
    text "Middle"
    text "Bottom"
    text "Rock bottom"
Each successive element appears below the line before it.
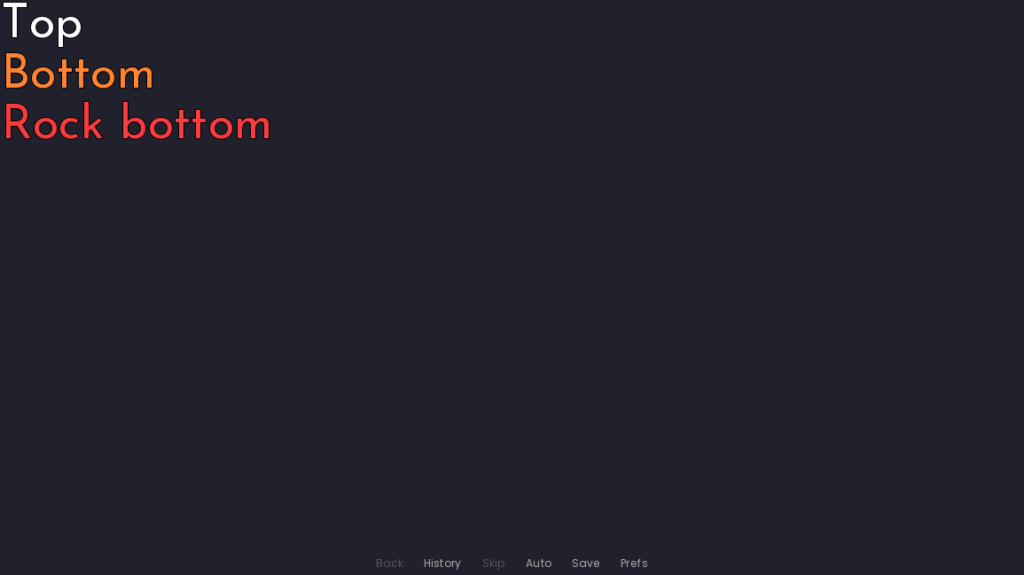
Removing an element from the vbox will cause all other elements below it to shift position up to take its place. So, for example, if you removed the line text "Middle" from the vbox above, then text "Bottom" would move up to be where text "Middle" originally was, and text "Rock bottom" would move up to be where text "Bottom" used to be. Similarly, adding new elements causes any existing elements below the new one to be shifted down to accommodate the new element.
Hbox
Hbox stands for horizontal box. It is similar to vbox, except as its name would suggest, it organizes its children horizontally, left-to-right, in the order they were added to the hbox in. You can think of it a bit like adding books to a bookshelf.
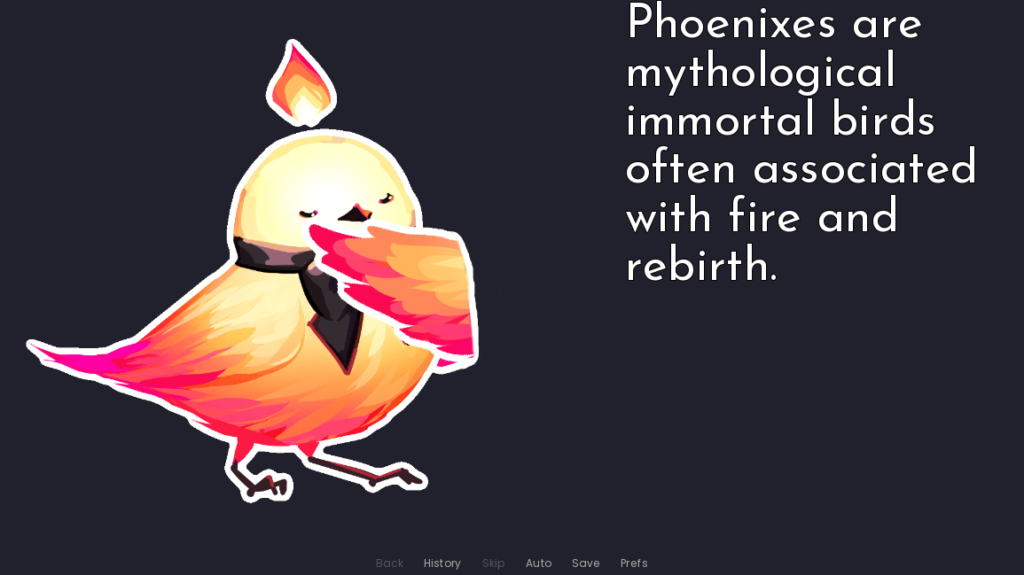
hbox:
    add "feniks closed right2"
    text "Phoenixes are mythological immortal birds often associated with fire and rebirth."
This will cause the image “feniks closed right2” to be displayed to the left of the text "Phoenixes are mythological immortal birds often associated with fire and rebirth.".
If you added many elements to the hbox, they would continue to be added to the right of the previous element.
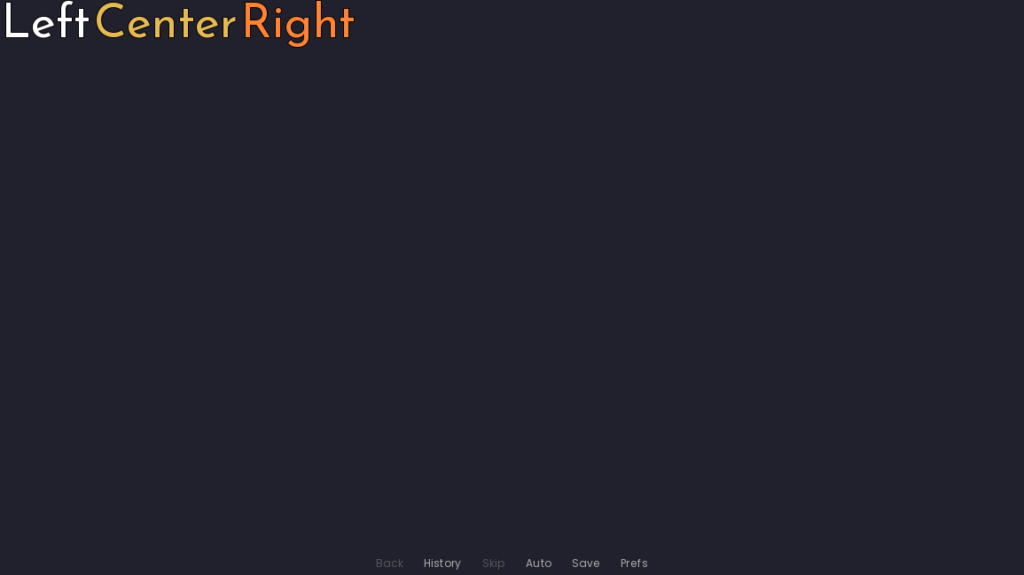
hbox:
    text "Left"
    text "Center"
    text "Right"
The text "Left" will be the leftmost element, and the text "Right" will be the rightmost element. These elements will not overlap by default, but if they were to overlap, “Right” would appear on top of “Center”, and “Center” would appear on top of “Left”.
As with vbox, removing or adding a new child to an hbox container will cause any children to the right of the new/removed element to adjust their position to either fill the space left by the removed element or shuffle to the right to accommodate it.
Summary
- Containers are used to organize elements on screens. The elements inside a container are known as its children. Each child of a container is positioned relative to the container, not the entire screen, so you can move containers around without affecting the layout inside it.
fixedjust provides a space to put elements inside. It doesn’t organize them in any way.vboxstacks elements on top of each other from top-to-bottom.hboxlines up elements left-to-right next to each other.- Elements added to the container earlier (higher up) in the code display behind elements added later (lower down) in the code
Next Steps
Now that you’ve seen some basic elements and some basic containers, it’s time to learn about properties to move them around so you can position them where you want on the screen. The next tutorial in this series is on pos and anchor positional properties: Ren’Py Position Properties – Pos and Anchor
You can also check out my recent tool release, Better Colorize for Ren’Py, available now!
I have a final for one of my college classes and I’ve been lost in the screen documentation for a week. I owe you my life!
Really glad to hear it’s been helpful! Good luck with your final ✨