
Welcome back to part II of the position properties series. Learn how to use the combination properties align and xycenter to quickly position elements on the screen, and how to use offset for animations and adjustments.

This tutorial builds off of concepts covered in earlier tutorials on screen language, particularly the previous part on pos and anchor. If you haven’t read part I, I highly recommend you do so here: Ren’Py Position Properties – Pos and Anchor. The position properties covered in this tutorial are combinations of the properties introduced in that tutorial, so if you don’t already understand those, you’ll have a harder time understanding this content.
As a quick review, I will be using element to refer to the thing you’re trying to position and container to refer to the space where you’re positioning the element (which may just be the screen as a whole).
Align
Now with knowledge of pos and anchor under your belt, you’re ready to understand align. align combines anchor and pos. It sets both of them to the same value. This is really excellent shorthand for several examples you saw before – namely, the following have align equivalents:
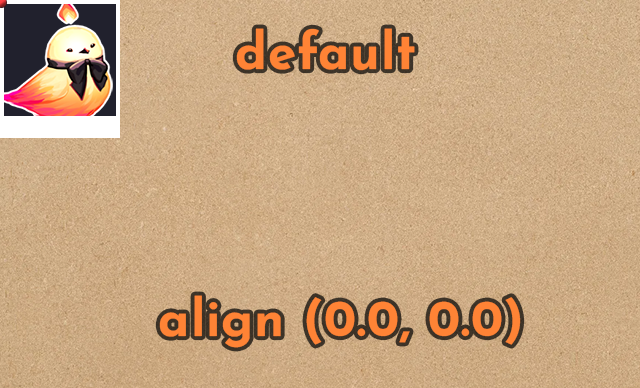

# Top left corner of the element against the top left
# corner of the container (default position for screen elements).
pos (0.0, 0.0) anchor (0.0, 0.0)
# SAME AS
align (0.0, 0.0)
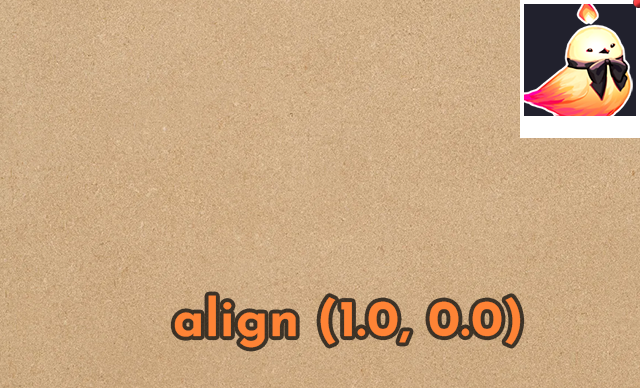
# Top right corner of the element against the top right
# corner of the container.
pos (1.0, 0.0) anchor (1.0, 0.0)
# SAME AS
align (1.0, 0.0)
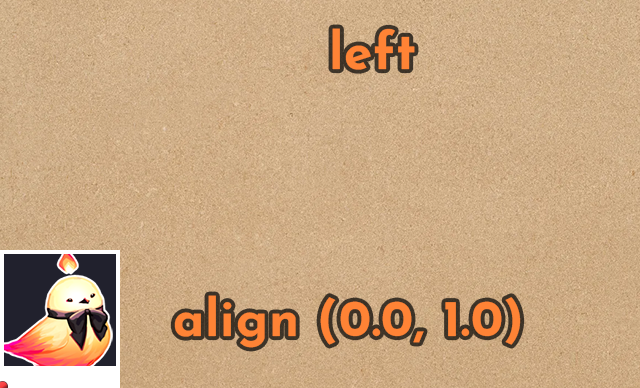
# Bottom left corner of the element against the bottom
# left corner of the container ("left" sprite position).
pos (0.0, 1.0) anchor (0.0, 1.0)
# SAME AS
align (0.0, 1.0)
# Bottom right corner of the element against the bottom
# right corner of the container ("right" sprite position).
pos (1.0, 1.0) anchor (1.0, 1.0)
# SAME AS
align (1.0, 1.0)
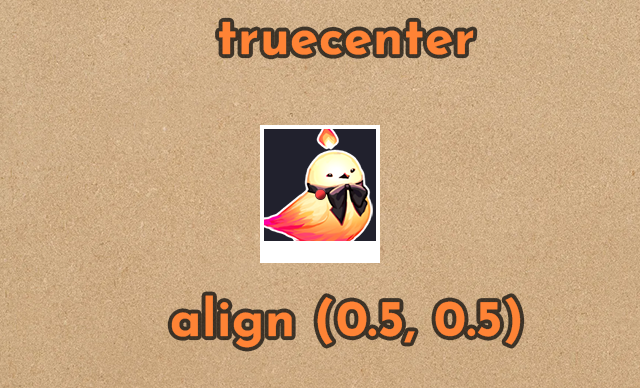
# Center of the element in the center of the container
pos (0.5, 0.5) anchor (0.5, 0.5)
# SAME AS
align (0.5, 0.5)
# The default sprite position, center
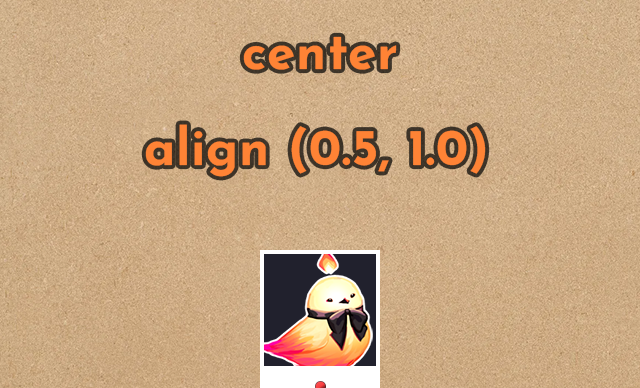
pos (0.5, 1.0) anchor (0.5, 1.0)
# SAME AS
align (0.5, 1.0)Common Problems and Misconceptions
You’re using align wrong
And now, here is my most important tip, which I am putting right up front and center because it is an extremely common coding mistake in Ren’Py:
If you are using values other than 0.0, 0.5, and 1.0 with align, you should almost certainly be using a different position property and NOT align.
But why? align is used all over in the default Ren’Py styles. You’ll also see it used with other values (incorrectly in my opinion) in lots of code examples all over various Ren’Py tutorials and games.
align is NOT well-suited to positioning things that are not centered or aligned to the edge of their container. Again, you’ll note that in all the examples in the last section, align is equivalent because both anchor and pos have the same value. That’s all align does – it sets the anchor and pos to the same thing. It will conflict with these properties if you use them together, in fact.
In the case that you’re centering something or lining it up against the edges (aka aligning it to the edges), align works excellently since you usually want those two values to be the same, so it makes for useful shorthand. That said, it does not extend well outside of these situations.
Doesn’t it move it to ___?
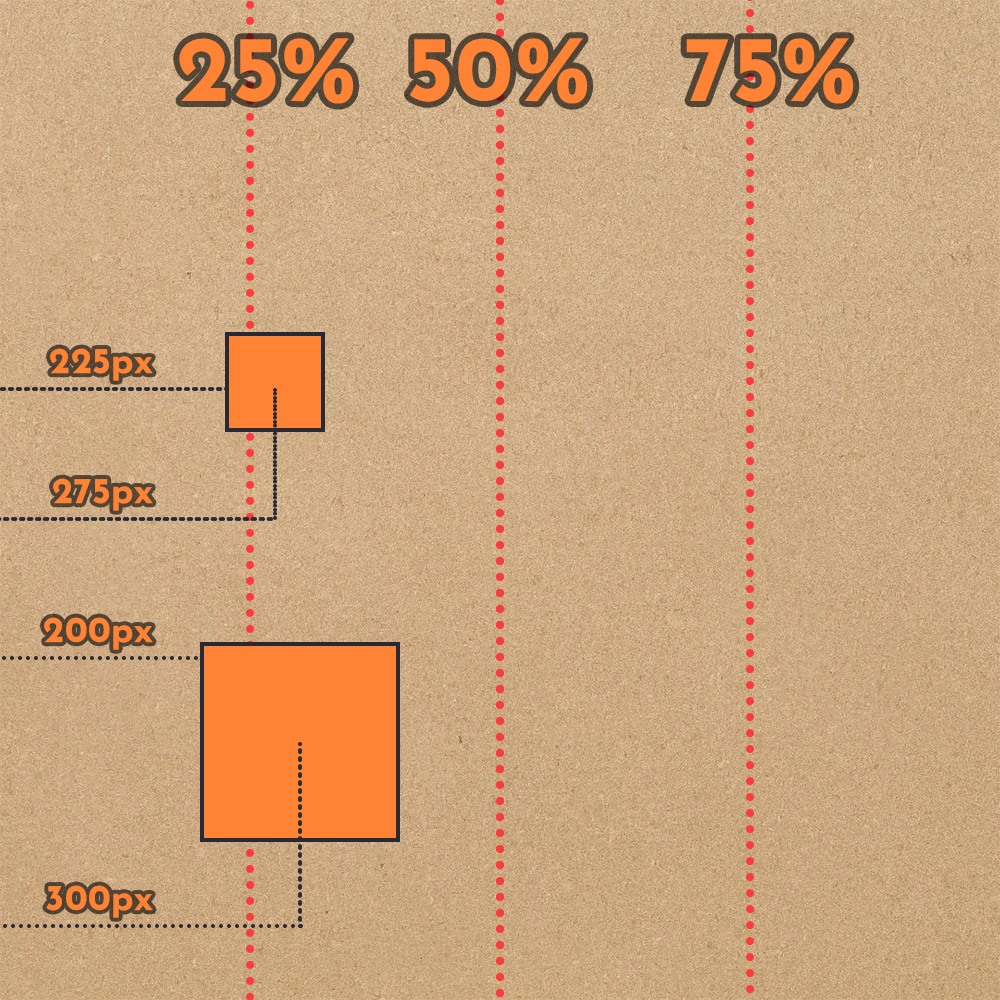
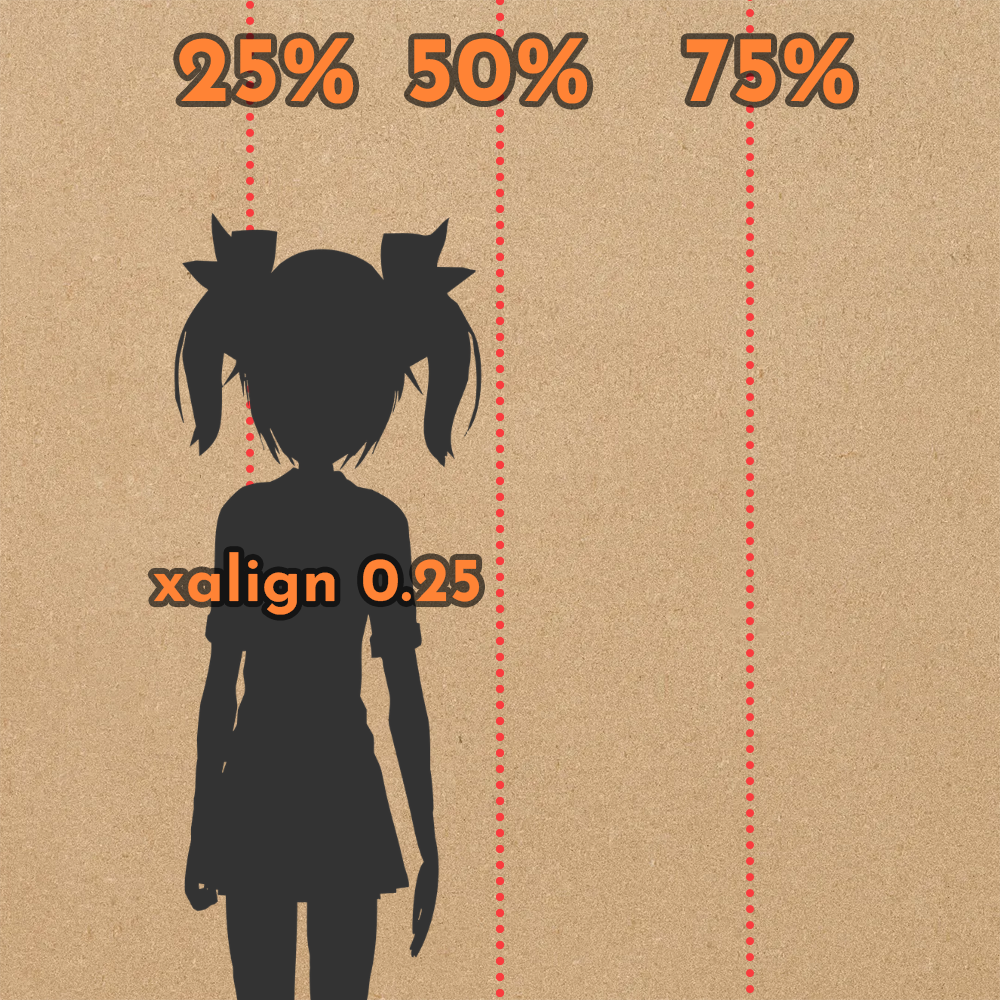
Take, for example, a common misconception: xalign 0.25 will move a sprite 25% of the way across the screen. Let’s assume this means it will put the center of the sprite 25% across the screen, as that’s likely what you wanted.
Remember, xalign 0.25 is equivalent to xpos 0.25 xanchor 0.25. So let’s do some math to see where that ends up. I’ll use very easy numbers to simplify the math as much as possible: Our container is the screen, which is 1000×1000 pixels. Our sprite is 100×100 pixels.
So first, xanchor 0.25 means that this sprite’s x-anchor point is 25% of the way right of the left edge of the sprite. So the x-anchor point is 25 pixels to the right relative to the top-left corner of the sprite.
Next, xpos 0.25 means that the anchor point is put 25% of the way across the container. So that point on our 1000×1000 screen is 250 pixels from the screen’s left edge.
All good so far, right? But when we put the anchor point 250 pixels across the screen, the left edge of the sprite is actually at (250-25) aka 225 and the center of the sprite is at (250-25+50) aka 275. 225 of 1000 means that the left edge of the sprite is 22.5% across the screen, and the center of the sprite is 27.5% across the screen. Neither of which is the 25% we were hoping for! Additionally, if I have sprites of different sizes – say, my sprite was (200, 200) instead of (100, 100) – it would end up somewhere entirely different (in fact, a 200×200 sprite at xalign 0.25 would end up with its center 30% across the screen instead of 25%. The math is (1000*0.25)-(0.25*200)+(200/2)=250-50+100=300).
Again, remember – align is setting BOTH anchor and pos to the same thing. It’s pretty rare that you want to have an anchor point 25% across the image when the image is also moving 25% across the screen. More likely, you wanted to move the center of the image 25% across the screen, or possibly the left or right edges 25% across the screen, neither of which you’ll get with align. One of the biggest problems with using align with values other than 0.0, 0.5, and 1.0 is that it can result in elements of different sizes ending up in vastly different locations as well, since the final position is relative both to the size of the element as well as the size of the container. When you’re trying to center the image, or line up its edges with the edges of the container, this is not an issue, but in most other cases, it is.
Why isn’t my sprite moving?
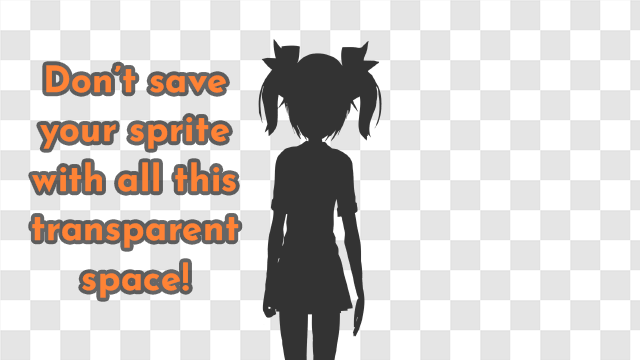
In short: your sprite isn’t moving because it has the same dimensions as your screen (e.g. your sprite image is 1920×1080 and your game is 1920×1080) and you’re trying to use align to move it.
The longer version:
Ren’Py’s default positions, left, center, and right, use xalign 0.0, xalign 0.5, and xalign 1.0 respectively. This means that it moves the left edge of the image against the left edge of the screen, the center of the image to the center of the screen, and the right edge of the image against the right edge of the screen, respectively.
Of course, if the image is the same size as the screen, that means the left edge of the image is at the left edge of the screen. The right edge of the image is already at the right edge of the screen. So no align values will do anything to move the image, because it is already aligned to every possible value by virtue of being the same size as the screen.
How do you fix this?
The best answer is usually to trim the transparent space off of your character sprite so it isn’t the same width as the screen anymore. If, for whatever reason, your sprite must be the width of the screen (maybe they’ve got big wings or some fancy magic SFX layers), then you should use yalign 1.0 in combination with xanchor 0.5 xpos 200 where 200 can be a float like 0.25 (to put the center 25% across the screen) or a pixel value like 200 to put the center that many pixels across the screen. You may also use xcenter, covered below. Do not use xalign to move the sprite.
For images that aren’t sprites but are the size of their container, you’ll generally want to use some combination of pos and sometimes anchor if you need the anchor to be somewhere like the center of the image.
What if I want relative screen positions, like 25% across the screen?
It’s also a common misconception that only align takes float values that act as a percentage of the container area, but if you’ve seen the previous tutorial, you’ll know that isn’t true; all position properties can take floats to act as percentages or integers to act as exact pixel values.
What will happen if the player views my game at a different size?
Occasionally some people will end up under the misconception that align is the only property which will properly position screen elements for different screen sizes. This is False; every positional property in Ren’Py accounts for the virtual screen size when you move it around, regardless of whether you’re using integers (e.g. xpos 400) or floats (e.g. xanchor 0.5).
As mentioned, align is a combination of anchor and pos. It doesn’t have any special properties to deal with resizing the game window – every positional property will correctly scale to suit the size the game is currently being displayed at.
xycenter
The next property is similar to align in that it combines anchor and pos, but in the case of xycenter (and its single-axis equivalents xcenter and ycenter), they set anchor to 0.5 and pos to whatever value you provide.
So, for example, the following are equivalent:
# Horizontally centered 25% across the screen
xanchor 0.5 xpos 0.25
# SAME AS
xcenter 0.25
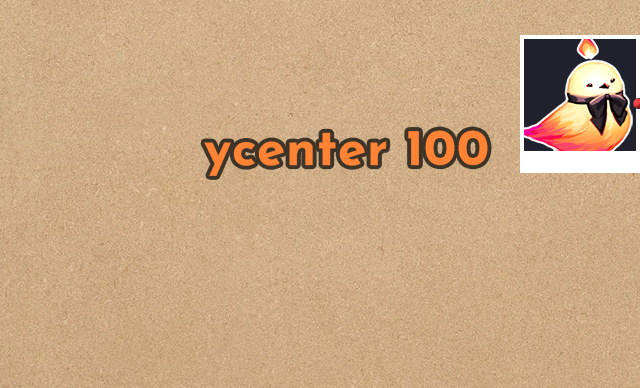
# Vertical center of the element is 400 pixels down the screen
yanchor 0.5 ypos 100
# SAME AS
ycenter 100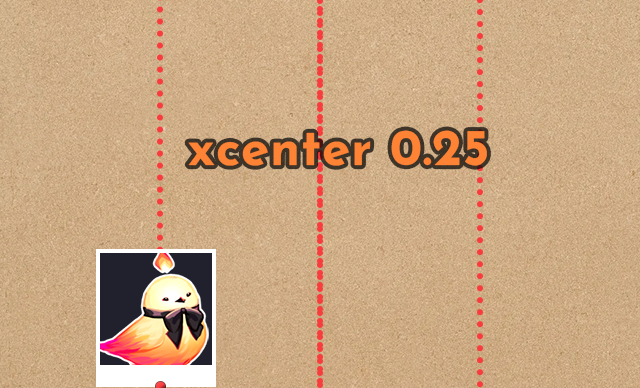
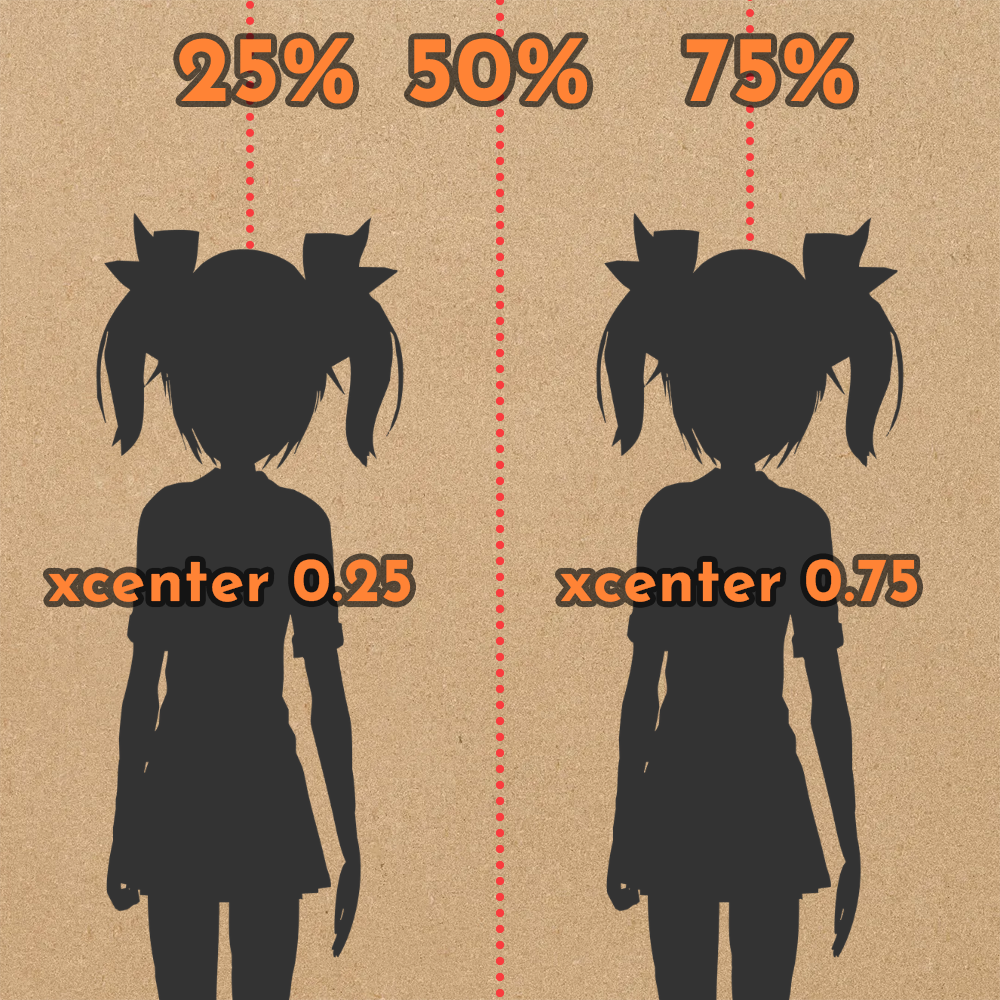
This is an excellent property to use for creating new positions for sprites outside of the default left, right, and center. It moves the center of the sprite to the position you provide, which is much more predictable and consistent across image sizes than using align would be. So, for example, here are two new positions you can declare:
# Center the sprite 25% across the screen
transform midleft:
    yalign 1.0
    xcenter 0.25
# Center the sprite 75% across the screen
transform midright:
yalign 1.0
xcenter 0.75You can use these positions in-game via show ashwin at midleft or show zoran at midright.
Offset
The last major tool in your positional properties toolset is offset. Like other positional properties, it has variants xoffset and yoffset for x-axis and y-axis positioning respectively, or offset to set them both in one property. Offsets are particularly helpful if you’re nudging an image slightly out of position, especially if you’re using align.
Like with all positional properties, floats act as a percentage of the container, and integers are exact pixel values. Moreso with offsets than with anything else, it’s also important to note that negative numbers move the element left/up and positive numbers move it right/down relative to its starting position.
For example, say you wanted to position some text at the bottom right corner of the screen, but 10 pixels away from the exact edge of the screen:

text "To be continued":
    align (1.0, 1.0) # Bottom right corner
    offset (-10, -10) # 10 pixels to the left & up
align (1.0, 1.0) will align the text in the bottom right corner, and offset (-10, -10) will move it 10 pixels to the left and 10 pixels up. pos wouldn’t work here because align (1.0, 1.0) is equivalent to anchor (1.0, 1.0) pos (1.0, 1.0), so trying to set pos would mean that only one of the provided positions would “win”. It would also be annoying to calculate something like (width_of_screen - 10) just to get an xpos for the text, so offset lets you retain the original position calculation (bottom right corner) and just, well, offset it a little.
If you aren’t setting an explicit position for an element (for example, if you’re using a container format like vbox to position elements relative to other elements) and still need to nudge it from its starting position, it’s generally better to use pos to move it rather than offset, since offset is best used to make tweaks to an existing position. It’s particularly helpful for ATL transforms, since offset will just tweak the existing position so you don’t have to know where the image is located on-screen to make it do things like gently float up and down.
Summary
alignsets bothanchorandposto the same value.- This makes it great for aligning elements to the left, right, top, bottom, or center of their container.
- It’s generally a bad idea to use it with values other than
0.0,0.5, and1.0because of how it takes into account the sizes of both the element and its container to get a final position. Most of the time, justposorxycenterwould be a better choice.
xycentersets theanchorto the center of the image (0.5) and theposto the value you provide. This has the effect of centering the image at the given coordinates. This makes it a great choice for the x position for custom sprite positions.offsetis used to adjust the element a little away from its current position. It’s best used only if you haveposset for some other reason (e.g. you’re using align to line the element up with its container edge) and just need to nudge it a few pixels away. Otherwise, useposto make position adjustments so you can saveoffsetfor things like animations.
Next Steps
Hopefully now you can make more educated decisions on which positional properties you should use to move elements around when you’re coding your UI screens and sprite positions for your game. When in doubt, pos is usually a good choice to move things around. If you’d like a more interactive way of understanding the concepts taught in both part I and this part, may be interested in this tool from bobcgames.
You might also be interested in my tool from last week, released over on itch.io! It’s a shader that programmatically adds outlines to images in code rather than needing to save individual images with outlines.


Hello. I am hoping that you can help me. I am completely stumped.
In my script, I place the dialogue box at different places on the screen depending on the image. Essentially, I treat it like a comic book, where I move the box around to avoid covering up as much of the artwork as possible.
The way that I achieve this now is to add phrases to the end of each line of dialgoue, such as:
(window_yalign=0.5)
(window_xoffset=1500)
(window_yalign=0.5, window_xoffset=1500)
(window_yoffset=-500, window_xoffset=1500)
The numbers change and the combinations vary depending on the placement of the box.
I am requesting help to simplify the process. Adding this to the end of each line of dialogue is very cumbersome. What I would like to do is create a statement that I can use once, and all the dialogue that follows uses that statement until it changes (a new statement). Or, better yet an if/then statement that changes the placement based on the image used. Such as, if scene X, then use defined positioning.
Any help would be appreciated. If I could find a more efficient way to do this, it would save me so much time. Please note that I am not talking about a universal gui change, but a change that would be added to the script and change multiple times depending on the scene or image used.
Thanks everyone!
Hey there! As this is a more involved question, and this comment section isn’t really made for forum-style answers, I recommend you ask this on the Lemmasoft forums (https://lemmasoft.renai.us/forums/) or in a server like the Ren’Py server (https://discord.gg/6ckxWYm). That way you can have a proper back-and-forth to get the help you need. Best of luck!