
It’s common for UI to reuse the same background for various UI elements, just sizing it differently based on its contents. Often this background has a repeating or solid pattern on the inside so it can be stretched or tiled to accommodate many sizes.
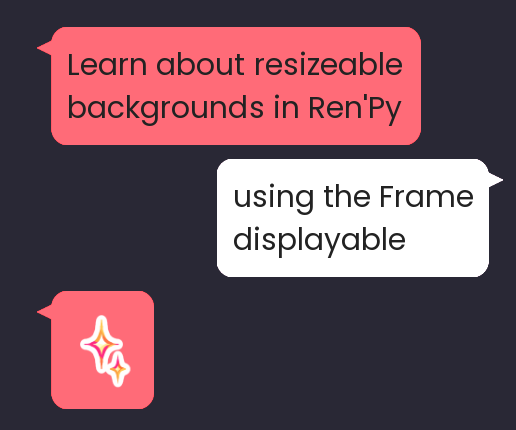
The most basic example of this is a messenger bubble in a chat app. The rounded corners and little speech bubble triangle will be the same size for all messages, but depending on how long the text is, the bubble sides may get longer or taller to accommodate the contents.
Luckily, Ren’Py has a built-in displayable you can use to achieve this effect for your UI as well without creating a whole bunch of additional images. It’s called Frame (not to be confused with frame, which we covered in Ren’Py Screen Language Basics – Frames – though Frame displayables are often used as backgrounds for frame containers). If you’ve done any development in Android, you might also know this technique as “9-patch”, for reasons which will become clear shortly.
This tutorial is designed to be understood as a standalone guide to Frame. In particular, the knowledge in this tutorial will be sufficient to let you swap out some images in the default GUI without needing to know anything else about screen language. That said, you may find it useful to read through more of my tutorials on screen language, in which case I recommend starting with Getting Started with Ren’Py Screen Language.
What is Frame?
At its core, Frame takes a displayable of some kind (generally an image) and slices it up in a 3×3 grid based on numbers you provide – hence the name “9-patch” for the 9 squares. The corners of the 3×3 grid (squares 1, 3, 7, and 9 in the image below) are preserved exactly as-is regardless of how big the Frame displayable will be, but the inner “+” of grid squares (squares 2, 4, 5, 6, and 8) will be either stretched (the default) or tiled to make the Frame as tall and wide as it needs to be.
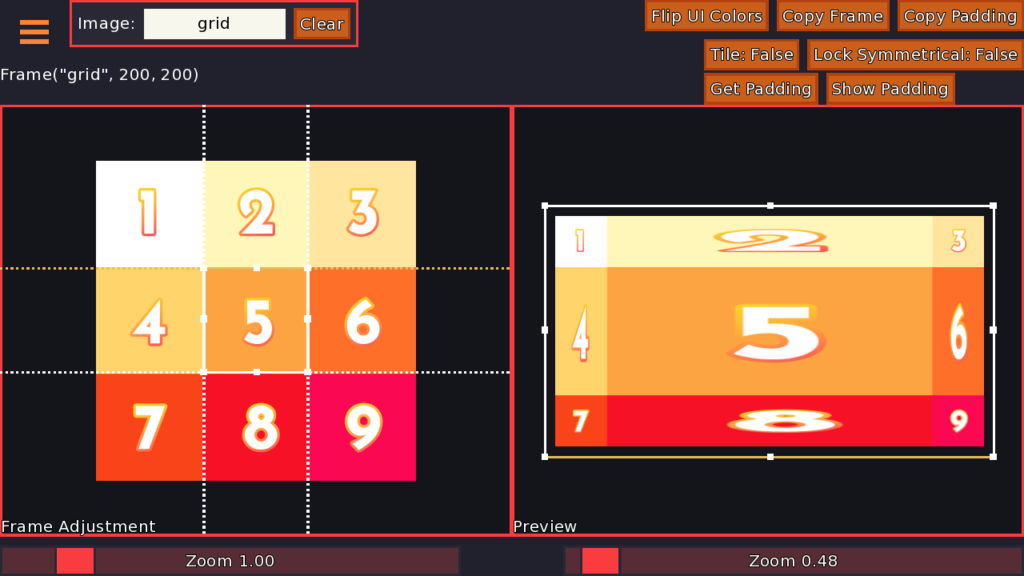
This makes it incredibly powerful for UI, since you can reuse the same Frame for the background of dozens of UI elements regardless of their size, since the Frame will handle resizing the background to whatever you need.
How to set up Frame
Frame takes as few as 2 arguments to set up. An argument is just a value of some kind that you’re going to provide to Frame so it can slice up your image properly.
The one consistent argument you will provide a Frame is an image or displayable of some kind. This is the displayable you’re trying to stretch/tile to fill out a background. You should be able to slice this displayable up into a 3×3 grid to make it work for a Frame.
Next, you have three main options for providing the numbers for the 3×3 grid.
Method 1: Two numbers
If you provide two numbers after the displayable, those are interpreted as the x border and the y border. So, take the following example:
image my_background = Frame("myframe.png", 25, 30)For this Frame, the left border will be 25 pixels from the left edge of the image and the right border will be 25 pixels from the right edge of the image. Similarly, the top border will be 30 pixels from the top edge and the bottom border will be 30 pixels from the bottom edge. Ren’Py will use these numbers to slice up the image “myframe.png” to turn it into a resizable image you can use as a background.
Method 2: Four numbers
If you provide four numbers after the displayable, those are interpreted as the (left, top, right, bottom) borders, respectively. You remember it by thinking of it going clockwise, starting at the left. For example:
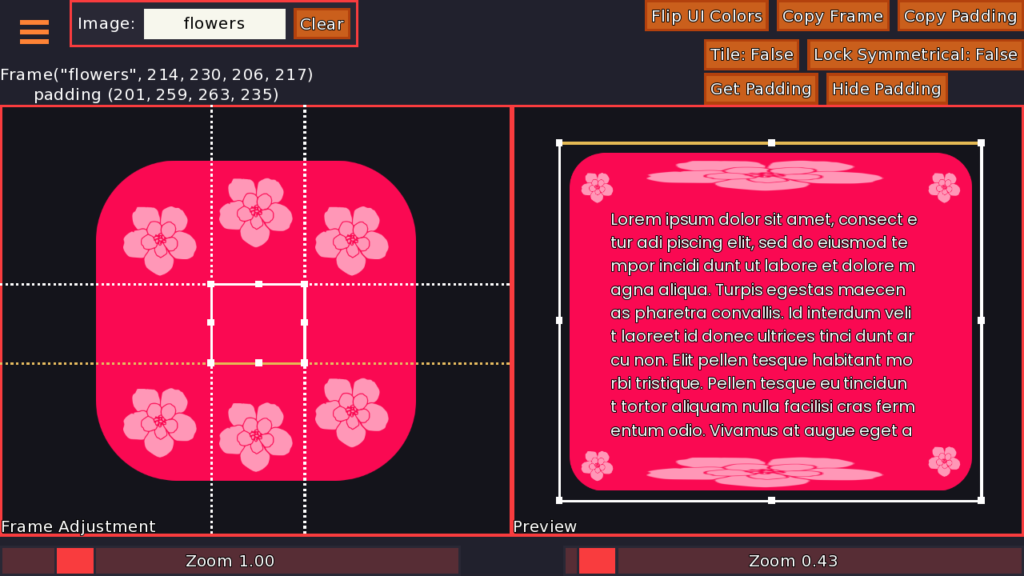
image floral_background = Frame("flowers.png", 214, 230, 206, 217)For this example, the left border is 214 pixels from the left edge, the top border is 230 pixels from the top edge, the right border is 206 pixels from the right edge, and the bottom border is 217 pixels from the bottom edge.
Method 3: A Borders object
You may also provide a Borders object right after the displayable, in which case the four numbers you provide act exactly like just providing 4 regular numbers would (so, left/top/right/bottom; see Method 2 above).
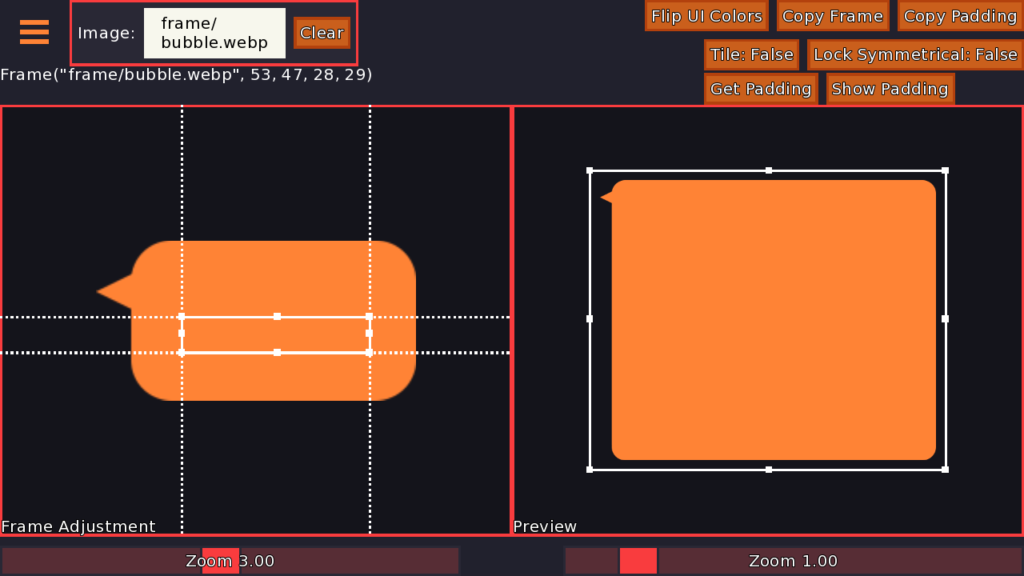
image speech_bubble = Frame("bubble.png", Borders(53, 47, 28, 29))In this case, the left border is 53, the top border is 47, the right border is 28, and the bottom border is 29. Borders are used a lot in the default gui styles as an easy way of holding four numbers for padding or Frame borders, though personally I don’t use them myself and generally prefer to directly provide numbers as in methods 1 and 2.
Note
Note that the numbers you provide to Frame to split up the displayable for stretching/tiling do NOT have to correspond to the padding for the displayable. Sometimes they are the same or similar, but you can use Frame to stretch unusual and asymmetrical displayables as well. In such a case, often at least one of the borders is much higher than the others (e.g. messenger bubbles with a little triangle. The side with the triangle has a bigger border than the other sides.).
Tiling
By default, the displayable provided to Frame will be stretched to fit the required area. However, there are some background designs that should be tiled instead of stretched, for example, frames with a dotted line border, frames with a repeating pattern on the inside, frames with a particular outline (e.g. with wavy edges for a thought cloud), etc.
There are two possible methods Ren’Py will use for tiling a provided image.
Method 1: Regular tiling
To make the displayable tile, simply add tile=True to the end of your Frame declaration e.g.
image polka_dots = Frame("gui/dots.png", 0, 0, tile=True)For this example, we have a polka-dot background that should be tiled when it’s resized to fit a larger area. Notably the borders are 0; this is perfectly valid if you don’t need to preserve the shape or style of the edges when the displayable is resized. In this case we’re using Frame primarily to tile the polka dots to fill out an area.
If you set tile=True for your Frame, Ren’Py will simply repeat the provided sections as many times as possible to fill out the area.
Method 2: Integer tiling
This method is very similar to the previous one, except instead of tile=True you’ll use tile="integer" e.g.
image thought_bubble = Frame("gui/thought.png", 20, 10, 20, 30, tile="integer")As opposed to regular tile=True, tile="integer" means that Ren’Py will calculate how many repetitions of each “tile” it can create to fill the given area, and then rounds that to the nearest integer.

So, for example, if your image is 50×50 and you provided borders of (20, 20, 20, 20), then the tiles will be 10×10 (since 20 pixels are taken up on each side of the displayable). If you then use this Frame to fit an area that’s 67×92 pixels wide, there will be (68-(20*2))/10 = 2.7 tiles along the top and bottom edges, which will be rounded up to 3. Similarly, there will be (92-(20*2))/10 = 5.2 tiles along the left and right edges, which will be rounded down to 5.
To get the final displayable, Ren’Py calculates these numbers and then squashes or stretches the tiles to fit. So, for the earlier example, three 10×10 tiles along the top and bottom edges would usually take up 30×10, making for a final width of 30+20*2=70. But if you recall, the provided width was 67, not 70. So Ren’Py will slightly squish each of the tiles to be 9×10 instead, so the final width is 20*2+9*3=67.
Similarly, the five 10×10 tiles along the left and right sides would normally take up an area of 10×50, giving the displayable a final height of 20*2+50=90 instead of 92. Ren’Py will slightly stretch the tiles vertically to fill out this space, so each tile is 10×10.4 instead of 10×10.
Unlike with tile=True, tile="integer" will look different depending on how large the tiled sections are. Generally, you should try to reduce your image to have the smallest repeating section possible for the best adaptability.
Which tiling method to use
In short, if it’s okay to have half a tiled square as part of your tiled background, just do tile=True. If each tile needs to contain the same contents and can’t be cropped/split, then use tile="integer" (and ideally either have each tile be fairly small or use displayable sizes that are close to a round number of tiles for your tiled Frame).
To use Frame in-game, you can declare it using the image statement and then use that as the background, or declare a Frame directly as the background property of a style or container.
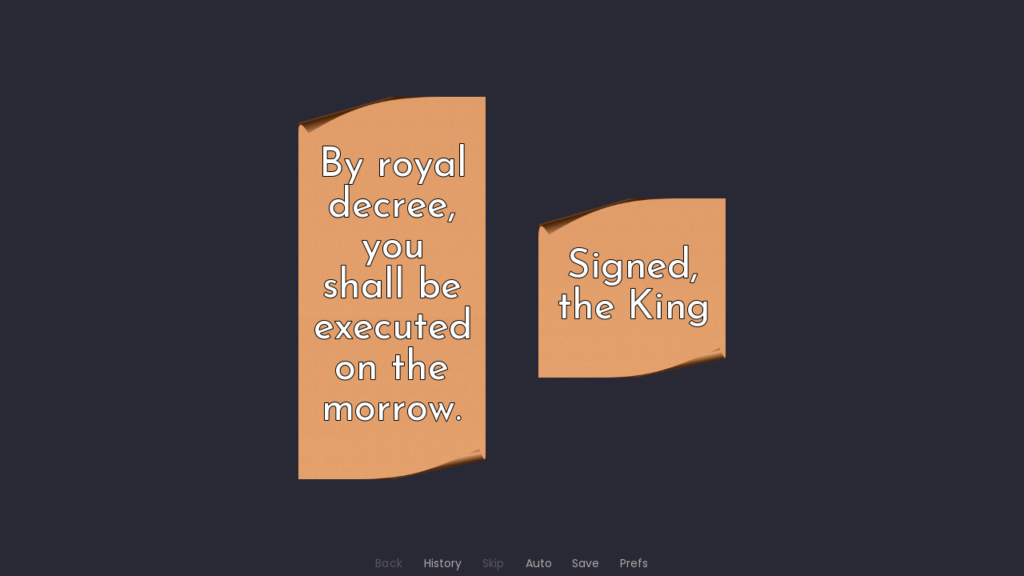
image history_scroll = Frame("scroll.png", 10, 120)
screen royal_decree():
    frame:
        # Uses your resizable scroll background
        background "history_scroll"
        # Since the scroll curls are fairly tall, this container
        # looks best with a minimum size
        yminimum 300
        text "By royal decree, you shall be executed on the morrow."
Note the background "history_scroll" line; this uses the history_scroll image declared just above the screen, which is a Frame.
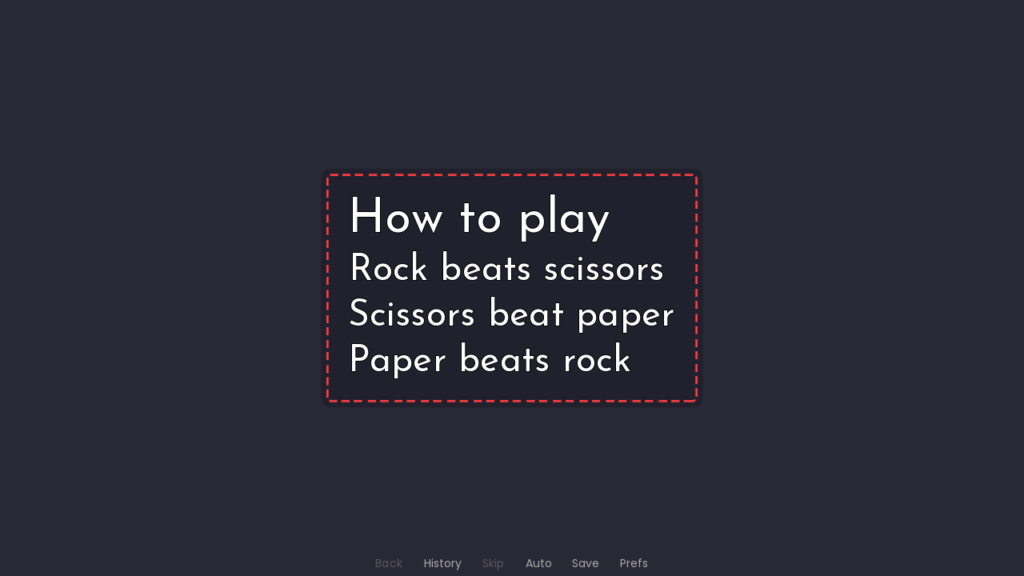
screen information():
    frame:
        background Frame("big_outline.png", 25, 25, tile="integer")
        has vbox
        text "How to play" size 50
        text "Rock beats scissors"
        text "Scissors beat paper"
        text "Paper beats rock"
In this example, the background for the frame directly uses a Frame as the value rather than declaring it as an image and using that.
Summary
Frameallows you to declare an image which will resize itself to fit whatever space it is given. You can provide information to Frame to customize how the image is stretched or squished to fit the available space.- Frame images are either stretched (default) or tiled (
tile=Trueortile="integer") to expand to fill additional space.tile=Truecan result in half tiles;tile="integer"will guarantee full tiles but may squish or stretch the tiles to fit the space. - You can use Frame anywhere a displayable is used – so, as the displayable for
backgroundproperties, in styles, added directly to screens withadd, etc.
Bonus tool
You may have noticed I’m using some kind of tool in the various screenshots for this tutorial – this tool is available on my itch.io:
You can use the tool to find the borders, tiling, and padding for a Frame image, and then copy the result to your clipboard to use in your game.
I just wanted to say thank you for all your tutorials you’re amazing
Thank you so much! I hope the tutorials can help you on your game dev journey ✨
Is there a way to have a transform effect that will dynamically resize the frame between different textbox messages?
I’m not sure I understand what you want to happen exactly, but if you want a resizeable image, then yes Frame is the way to do that. You can use Frame for your textbox background as well – note that the default styles use xfill and a set ysize for the textbox though, so you’ll need to change those properties (usually to an x/yminimum) so it can expand to fit the text.
These have been really wonderful, there’s really no comparison out there in terms of explaining these concepts clearly with an eye towards Ren’py game development. Is this series complete or should we expect some more? I’d love to have similar clarity brought to more complicated concepts like lists, dictionaries, and classes, which I know I should probably master but have trouble finding equivalent tutorials for. Either way, thank you for everything you’ve done!
I’m still an active part of the Ren’Py community, and I would like to continue making more tutorials in this series! 2025 has been quite busy for me, though I do have some drafts in the works. I actually was working on the next tutorial a few weeks ago and came across an engine bug that really needs to be resolved before the tutorial is released (as the property I would like to explain does not work like it should lol) which caused me to lose a bit of steam there 😅
I really appreciate your kind words! It’s nice to know someone is looking forward to more ✨