
So you’ve taken the leap and you’re going to try programming a game in Ren’Py. That’s amazing! But now you need to figure out what to download and how to get started. Luckily for you, that’s exactly what this guide is for. We’ll cover how you can get set up with Ren’Py, a code editor, and begin programming your first game.
What you’ll need
- A computer that runs on Mac OS, Linux, or Windows
- An internet connection
What you’ll have by the end of this tutorial
- A copy of the Ren’Py launcher
- A code editor to edit your game in
- A new Ren’Py game to begin working on
This tutorial is for people who are just starting out with Ren’Py and may be new to coding and making games in general. You’ll learn how to set up Ren’Py on your computer and how to start modifying the files to make your very own game.
Downloading and Installing Ren’Py
Downloading Ren’Py
The first and most important thing is to download Ren’Py! You can find the latest version at https://www.renpy.org/latest.html. As of today’s date (February 29, 2024), the latest version of Ren’Py is v8.2 “64bit Sensation”. v8.2 uses Python 3.9. It is released alongside v7.7, which remains on Python 2.7. For new games, you should use v8.0+, as it can take advantage of the many excellent features Python 3 brought to the language.
You may notice there are three large download buttons – an SDK 7z.exe, an SDK dmg and an SDK tar.bz2. Which one you need depends on which operating system your computer uses. If you’re on Windows, you need the 7z.exe file. However, if you’re on Mac, you need the dmg file instead, and Linux users can get the tar.bz2 file. There is also an ARM Linux tar.bz2 file for Raspberry Pi and Chromebooks linked underneath the three large buttons for Windows, Mac, and Linux.
Note: While Ren’Py runs on several operating systems, I use Windows myself and so this tutorial will focus on the setup from this perspective. However, the instructions should be generally applicable to all operating systems.
Save that file somewhere you’ll remember where to find it on your computer. I recommend saving it directly to a C:\Program Files folder or similar, since this is where your installation of Ren’Py is going to live from now on. In particular, saving it to OneDrive is not recommended and has been known to cause issues.
Installing Ren’Py
Once it’s downloaded, navigate to where you saved the file and unzip/unpack it with your program of choice. 7-zip is a good free choice for Windows: find it here: https://www.7-zip.org/download.html. You should end up with a folder titled something like renpy-8.2-sdk. Open that up.
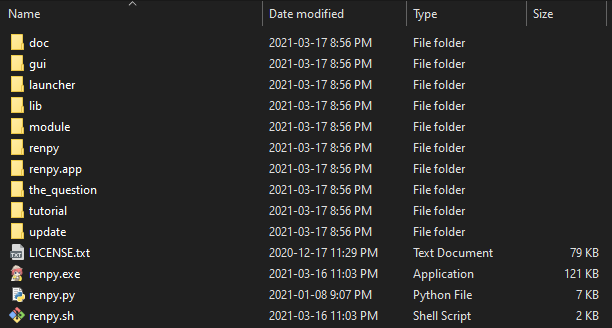
Now in here you’ll see a bunch of different folders and, most importantly, the executable file. The renpy.exe file is the most important one. This is the file that will run the Ren’Py launcher. While you’re here, I recommend you make a shortcut to it, either on your desktop or in your start menu. The easiest way to do this on Windows is to right-click the renpy.exe file and hit either Create shortcut or Pin to Start from the resulting menu.
Opening Ren’Py

Next, double-click on your shortcut or on renpy.exe to start the Ren’Py launcher. As you can see, there aren’t many things in the Projects list on the left, but you’ll add to that as you make your first project. The first thing you should do, though, is go to preferences in the bottom-right corner.

There are a few options here to do things like change your language and change the projects directory. Go ahead and change your language if needed, and then click on the file path under Projects Directory in the top left (in the screenshot, it’s just C:\).
This brings up a file explorer. Navigate to (or create) a folder where you want to put your Ren’Py projects. I recommend making a folder just for your projects somewhere like Documents/RenPy/ so that all your projects are in one central place.
Launching a Game in Ren’Py
There are two games included with the default Ren’Py installation: Tutorial and The Question. They’re always listed at the bottom of your list of projects on the main Ren’Py launcher. To play through them, select the game from the Projects list and then hit Launch Project in the bottom right. The game should open in a separate window and you can play through it.
The Question is a short game that showcases basic Ren’Py features like showing and hiding images, creating choice menus, and remembering variables.
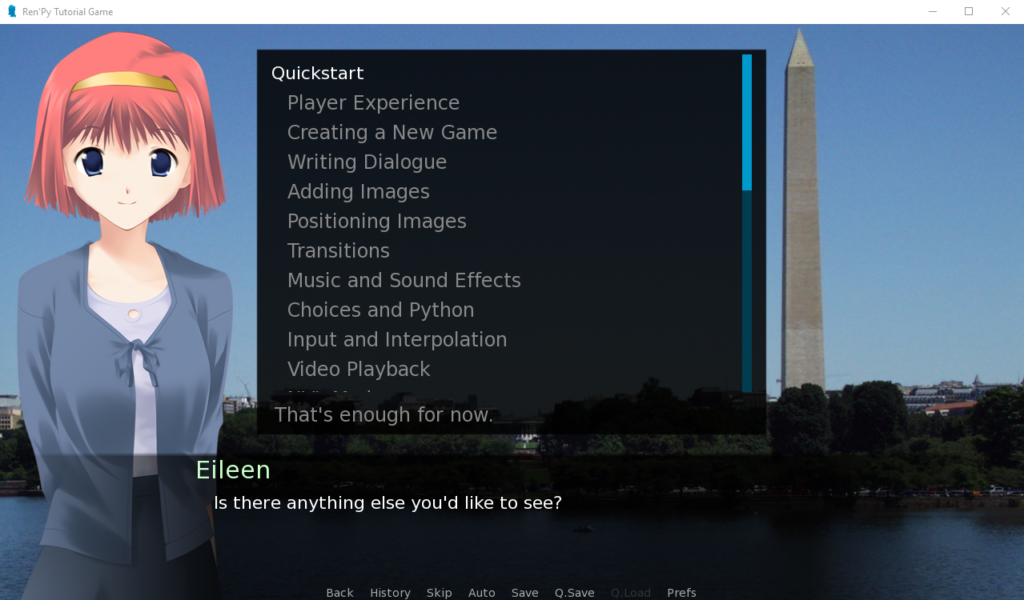
Tutorial is a central “hub” coded in Ren’Py that showcases more of the features Ren’Py is capable of that aren’t included in The Question. You’ll see many complex features here too, like minigames and animation. I recommend you look at the Quickstart topics to get an idea for what Ren’Py is capable of.
Creating a New Project
Now that you’ve got the Ren’Py launcher and tried some Ren’Py games, it’s time to make your own! On the left side of the Ren’Py launcher, under the Projects list, there’s a button + Create New Project. Click that, and you’ll see a short series of questions to help you set up your project. Aside from naming your project, you can generally just click Continue at the bottom right to pick the default settings and set your project up.
Once you’ve finished answering the creator’s questions, Ren’Py will generate the new project and you should see it under your list of Projects on the left. You can hit Launch Project to play through the few lines of script the project includes by default.
Editing Your Project
Installing a Code Editor
Now that you’ve made a new project, you probably want to get started editing it! But first, you need a program to edit code in. Coding is different than writing something like an essay, so there are special programs that will help you format your code and colour-code it so it’s easy to read.
I recommend Visual Studio Code, or VS Code for short. It’s free to download for Windows, Mac, and Linux.
The other possibilities that you’ll see are:
| Editor | Description |
| Editra | Editra was previously offered by older versions of Ren’Py. It hasn’t been updated in several years and the website it was originally distributed from no longer exists, so Ren’Py no longer offers this editor. |
| jEdit | A lightweight but very old code editor. jEdit lacks many useful features of more modern code editors. It is no longer offered in modern versions of Ren’Py. |
| Atom | Atom is an editor which is no longer under development as of 2022, but was offered in previous versions of Ren’Py. Atom has a file save bug that can cause code files to be corrupted. I suggest VS Code instead. |
| Visual Studio Code (VS Code) | A free, open-source editor with many features to make code editing as smooth as possible. Has a Ren’Py extension for code highlighting and can be integrated with Git for version control and backups. |
Ren’Py can install a code editor for you right from the launcher. In the Preferences page, just below the Projects Directory you set earlier, you will see “Text Editor”. Your editor is likely set as “None” to start. Click that and you will be taken to the following page.

You can click on “Visual Studio Code” at the top of the list. You will be prompted to accept the Microsoft Software License Terms. Click Continue to proceed and Ren’Py will download and install VS Code for you, including the Ren’Py extension.
Opening Your Code
Head back to the main launcher screen and make sure your project is selected on the left under the Projects header. On the right side of the launcher, it says Edit File and then lists a few .rpy files along with the option All script files. Click on All script files.
If you’ve set everything up correctly, VS Code should open with the four files gui.rpy, script.rpy, options.rpy, and screens.rpy listed at the top as tabs. You can adjust the colour theme used in VS Code by clicking File at the top of the window and going to Preferences -> Color Theme.

The themes are categorized into Light, Dark, and High Contrast. Feel free to try them out and see which one you like best. The code you’ll see on this website uses colouring very similar to the Monokai theme, as that’s what I like to use when coding. There are also lots of extensions that have different colour themes, so you’re sure to find one that suits you.
Conclusion
Now that you’re done with the tutorial, you should know how to:
- Get the Ren’Py launcher set up on your computer
- Change your projects directory in Ren’Py
- Create a new Ren’Py project
- Open Ren’Py script files in your code editor
And that’s the basics for getting set up with Ren’Py! Feel free to play around with the code in the .rpy files you opened to see what happens in your game (just make sure to save your changes before launching the game again so they take effect).
Next Steps
Now that you’ve got Ren’Py all set up, you should first take a look at the Ren’Py Quickstart to learn about the basics of making a game in Ren’Py. You can also read Organizing a Ren’Py Project to learn more on how to organize your project. After that, you can read A Quick Primer on Variables in Ren’Py to learn more about using variables in your script.

i’m new to Ren’py and just found you on itch.io! thank you for these tutorials, they’re well made and easy to understand :>
Thank you for making a post about this. I got Ren’Py Launcher running on a Linux system, but when I try to install from the same tar.bz2 on a different Linux system (same system distribution), nothing happens except for generic “unable to locate” errors. The directory isn’t hidden. Do you have any suggestions?
Hmm, I’m not a Linux user myself so I don’t really have further insight into the matter. I recommend looking into the Ren’Py Discord or Lemmasoft Forums for more general troubleshooting assistance!