
Controller Support Expansion for Ren’Py includes several features to improve controller and keyboard support in Ren’Py. Pick up the tool from itch.io if you haven’t already:
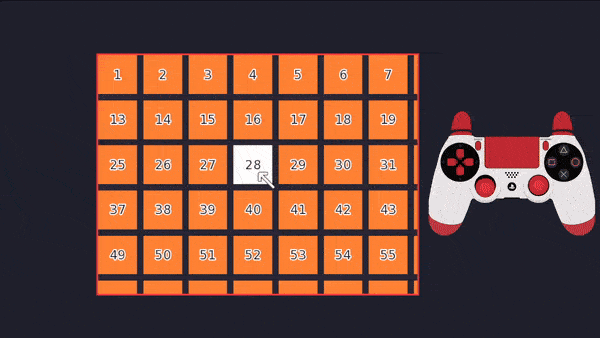
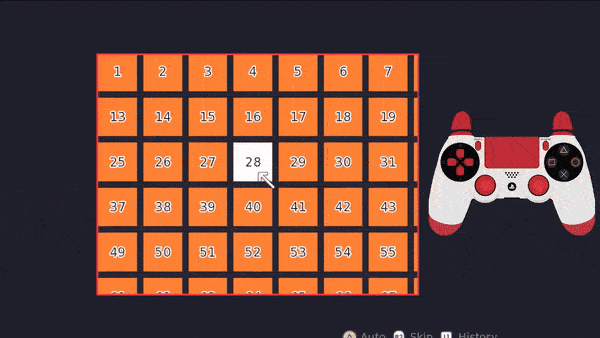
A virtual_cursor is a cursor which can be controlled via the keyboard arrow keys and controller sticks. It can be used to select buttons and other interactable elements and perform mouse-like actions like drag and drop or viewport edgescrolling. It can also be attached to pre-existing viewports to scroll them. It does not require any mouse hardware, so it’s suitable for devices that don’t have a mouse.
Examples
The following are some examples of how to use the virtual cursor in screens.
Example 1
This first example just adds a cursor to the full screen. Importantly, the virtual_cursor belongs at the bottom of the screen so it appears on top of the other buttons and receives events first.

screen rice_field():
    add "ricefield eve"

    imagebutton:
        idle "sylvie_green_normal"
        hover "sylvie_green_hover"
        align (0.5, 1.0) focus_mask True
        action Jump("talk_to_sylvie")

    virtual_cursor:
        cursor ("cursor_arrow", 12, 30)
There’s only one essential part of using the virtual cursor, which is providing it with a cursor image to use. The cursor property takes 3 items, separated by commas: first, a displayable to use for the cursor, and second and third the x and y positions of the cursor’s “hotspot”, respectively. The “hotspot” determines which part of the cursor actually highlights things on-screen and interacts with the UI. Typically this is the point of an arrow, or the center of a circle.
In this example, the cursor is free to move around the entire screen. This could be part of an investigate section, where you click on different characters to speak with them. Clicking on the image of Sylvie will jump to the label talk_to_sylvie due to the Jump action on the button. Because there are no draggable items nor an edgescrolling viewport in this screen, we do not need to place the screen contents inside the virtual cursor container, so it can go at the bottom of the screen (on top of everything else).
Example 2
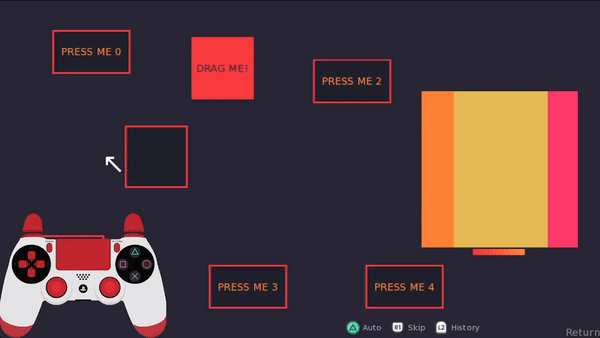
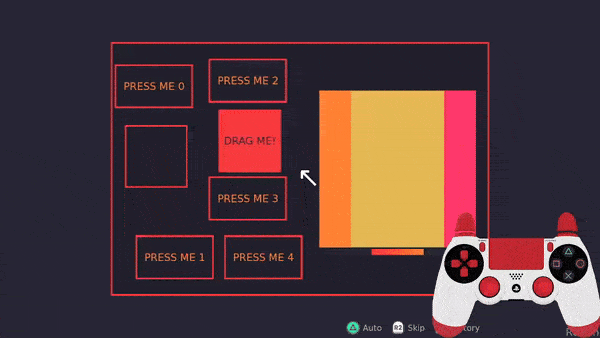
In this example, the cursor is limited to a particular area on the screen. It also has a draggable item inside of it, and an edgescrolling viewport. This means that the virtual_cursor will act as a container to hold all the buttons, draggable item, and viewport inside of it.
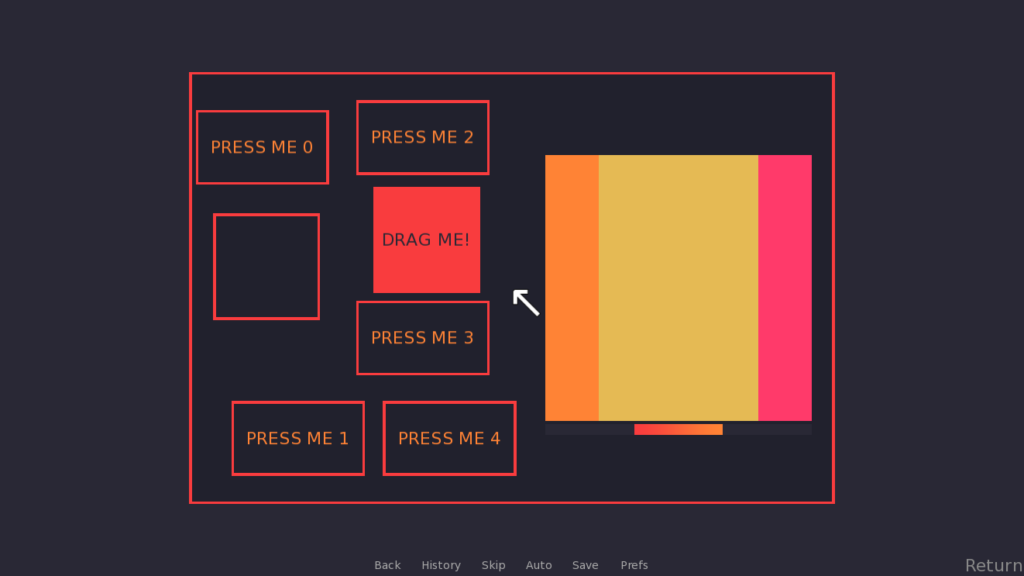
screen cursor_example_2():

    frame:
        ## This outlines the area where the virtual cursor is used
        xysize (1210, 810) align (0.5, 0.5) padding (5, 5)

    virtual_cursor:
        cursor ("cursor_arrow", 12, 30)
        ## By using the position class, we can specify that the cursor area
        ## is centered (0.5). position(-1200//2.0, 0.5) puts the top left corner
        ## 600 pixels (1200/2) to the left of the center (0.5). The width is 1200
        ## and the height is 800.
        cursor_area (position(-1200//2.0, 0.5), position(-800//2.0, 0.5), 1200, 800)
        snap_to_center True
        speed 1000.0
        which_stick "both"

        ## The rest of this code is just the stuff inside the screen
        style_prefix 'example'
        textbutton _("PRESS ME 0") action Notify("Pressed 0") align (0.22, 0.22)
        textbutton _("PRESS ME 1") action Notify("Pressed 0") align (0.26, 0.8)
        textbutton _("PRESS ME 2") action Notify("Pressed 0") align (0.4, 0.2)
        textbutton _("PRESS ME 3") action Notify("Pressed 0") align (0.4, 0.6)
        textbutton _("PRESS ME 4") action Notify("Pressed 0") align (0.43, 0.8)

        frame:
            align (0.72, 0.5) xysize (500, 500) padding (0, 0)
            has vbox
            viewport:
                edgescroll (150, 600) xinitial 0.5 id 'vp1'
                has fixed:
                    fit_first True
                hbox:
                    ysize 500
                    add "stripes"
                textbutton "BUTTON 1" action Notify("Button 1 pressed"):
                    align (0.2, 0.9)
                textbutton "BUTTON 2" action Notify("Button 2 pressed"):
                    align (0.9, 0.2)
            bar xsize 500 ysize 20 value XScrollValue('vp1')

        draggroup:
            drag:
                pos (700, 350)
                draggable True
                frame:
                    style "example_drag"
                    text "DRAG ME!" style "example_drag_text"
            drag:
                pos (400, 400)
                draggable False
                droppable True
                frame:
                    xysize (200, 200)
The virtual cursor always takes up the full size of the screen, so if you’re adding it onto an existing screen you can simply indent everything inside of it.
As with last time, we provide a cursor to use. There are a few new properties as well. The cursor_area property defines where the cursor is allowed to go. It takes an (x, y, width, height) tuple for the area. Note that the size of this area does not affect how the displayables inside the virtual_cursor: block are arranged; for position purposes, the virtual_cursor: container is the size of the screen, and the cursor_area only restricts where the cursor can move to in that area.
Next is snap_to_center True. This means that if the player stops moving the virtual cursor when it’s partly over something interactable, like a button, it will animate to the center of the button.
Next is speed 1000.0. This is the maximum speed that can be achieved with the controller sticks. It’s in approximately pixels per second.
Finally, which_stick "both" means that both controller sticks can be used to move the cursor around. It can also be set to just "left" or "right" (or None, for no sticks).
Example 3
Finally, we’ll look at an example where the virtual cursor is attached to a pre-existing viewport.

screen parallax_with_cursor():

    parallax_viewport:
        mousewheel "horizontal" draggable True align (0.0, 0.5)
        edgescroll (100, 600)
        xysize (800, 272*2) id 'parallax_vp'
        has fixed style "vparallax_fixed"
        fixed:
            fit_first True
            add "forest_back"
            textbutton "This is a button in the background" action NullAction() align (0.2, 0.8)
        fixed:
            fit_first True
            add "forest_mid"
            textbutton "This is a button in the midground" action NullAction() align (0.5, 0.5)
        fixed:
            fit_first True
            add "forest_front"
            textbutton "This is a button in the foreground" action NullAction() align (0.9, 1.0)

    virtual_cursor:
        cursor ("cursor_arrow", 12, 30)
        cursor_area (0, position(-272, 0.5), 800, 272*2)
        viewport_id 'parallax_vp'
        pin_to_coordinates (0.5, 0.5)
        unpin_at_edge True
        keyboard_speed 400.0 speed 400.0
To get parallax viewports in your own game, pick up the tool here:
In this example, the virtual cursor is again at the bottom of the screen declaration so it is on top of everything. In particular, it has the property viewport_id, which is set to the ID given to the parallax_viewport earlier in the code. This means it can control the scrolling of the viewport when moved.
It also uses the pin_to_coordinates property to keep the cursor centered where possible. pin_to_coordinates takes an (x, y) coordinate pair where the cursor will be pinned to. It takes floats, integers, and position types like other position properties, so (0.5, 0.5) means 50% across the cursor area.
Next, there’s unpin_at_edge, which is set to True so that the cursor can travel to the edge of the screen. If it was False, the cursor would be permanently pinned to the center of the viewport, so the player couldn’t move it down to select the buttons at the edges of the screen. This might be fine for some kinds of UI, or if you pad out the contents of the viewport so it’s always reachable while having the cursor in a fixed position.
Finally, keyboard_speed is the speed at which the keyboard arrow keys can move the virtual cursor, just like speed is the speed at which the controller sticks can move the cursor. Both are in pixels per second.
Properties
Besides the properties seen in the above examples, the virtual cursor has several other properties you can use to customize how it looks and behaves.
cursor
If provided, this should be a tuple in the form (Displayable, xoffset, yoffset) which will be used as the cursor image for this virtual cursor. The xoffset and yoffset are the offsets where the hotspot is on the image, relative to the top left corner. The hotspot is the pixel on the cursor image which focuses elements beneath it. The Displayable can be a direct image path like "gui/cursor.png" or any other kind of Displayable used by Ren’Py.
This property can be omitted if the "default" key is provided to the cursors dictionary.
e.g. cursor ("pointer_finger", 3, 4)
cursors
If provided, this is a dictionary of event name : (Displayable, xoffset, yoffset) pairs which correspond to cursors which should be used for the provided event. If the cursor property is not provided, this dictionary must have at least the "default" key in it. If not provided, it uses the dictionary for pad_config.DEFAULT_VIRTUAL_CURSORS (see the page for configuration variables).
The events and arguments are as for the built-in Hardware Mouse Cursor as seen in the Ren’Py documentation: https://www.renpy.org/doc/html/mouse.html#hardware-mouse-cursor
e.g.
cursors {
    "default" : ("gui/finger.png", 3, 4),
    "investigate" : ("gui/magnifying_glass.png", 5, 5),
}
start_pos
An (x, y) tuple which is the starting position of the cursor. If not provided, the cursor will appear in the center of the given area. The x and y values can be integers, floats, absolute, or position types.
e.g. start_pos (0.5, 0.8)
keyboard_speed
A float. The speed at which the cursor moves when controlled by the keyboard keys, in approximate pixels per second. Default is 1000.0.
e.g. keyboard_speed 1200.0
hide_on_mouse
If True, the default, the virtual cursor will be hidden when the mouse is used. If False, it will remain on-screen. This is in real-time – so, if you are using the mouse to click something, the virtual cursor will be hidden. But if you wiggle the controller stick or press one of the arrow keys, it will reappear.
e.g. hide_on_mouse False
snap_to_center
Default is False. If True, the cursor will snap to the center of the focused element when it stops moving.
e.g. snap_to_center True
snap_delay
A float. This is how long it takes from when the cursor has stopped moving to snap it to the center of the focused displayable, in seconds. 0.5 by default.
e.g. snap_delay 0.1
warper
The warper function to use for the snap_to_center movement. Can be a string like "linear", in which case it must be the name of one of the built-in warpers (see https://www.renpy.org/doc/html/transforms.html#warpers). Otherwise, it can be a callable which will be passed a value between 0.0 and 1.0 and is expected to return a float. Default value is "ease".
e.g. warper "easein"
which_stick
Which controller stick can be used to move the virtual cursor. One of:
“left”
The left controller stick can be used to move the cursor. The default is “left”.
“right”
The right controller stick can be used to move the cursor.
“both”
The left and right controller sticks can both be used to move the cursor.
None
Neither of the controller sticks will move the cursor.
e.g. which_stick "both"
debug
If True, a small red dot will be drawn where the “pointer” (hotspot) part of the cursor is, for debugging. False by default.
e.g. debug True
speed
The maximum speed at which the cursor moves when controlled by the controller. Analogue controller sticks may move the cursor slower if not pushed to the edges. The speed is a float, approximately equivalent to pixels per second. Default is 1000.0.
e.g. speed 1500.0
pin_to_coordinates
A tuple of (x, y) coordinates where the cursor should be pinned to. If set, instead of the cursor moving when the arrow keys/controller sticks are used, everything else will move around it. Typically this is the center of the area (e.g. (0.5, 0.5)). Also used when the virtual cursor is associated with a viewport.
e.g. pin_to_coordinates (0.5, position(100, 0.5))
crop_outside_area
If True, anything inside the virtual cursor container will be cropped if it goes outside the container area. Default is False. Usually only set to True when pin_to_coordinates is set.
e.g. crop_outside_area True
cursor_area
An (x, y, width, height) tuple of the area the cursor moves around in, relative to the full screen size. If not provided, this is just the size of the full screen. This can be integers, floats, absolutes, or position.
e.g. cursor_area (position(-300, 0.5), position(-300, 0.5), 600, 600)
In the example, the cursor area is a 600×600 square centered in the screen thanks to position(-300, 0.5) putting the x and y coordinates -300 pixels away from the center (0.5).
viewport_id
If provided, the cursor will scroll the viewport with the given ID instead of moving itself. This can be used to attach the cursor to external viewports such as my parallax or zoom viewports.
e.g. viewport_id "zoom_viewport"
unpin_at_edge
If True, and pin_to_coordinates and viewport_id are set, the cursor will “unpin” from its pinned position when it reaches the edge of the viewport, so that elements on the edge can be interacted with (aka it moves the cursor instead of the viewport at the edges). Otherwise, viewports should be padded to account for unreachable areas. Default is False.
e.g. unpin_at_edge True
The example above shows the virtual cursor scrolling a viewport with unpin_at_edge False. The virtual cursor is always in the exact center of the cursor area/at the pinned coordinates.
The example above shows the virtual cursor scrolling a viewport with unpin_at_edge True. The virtual cursor is in the exact center of the cursor area until it gets to the bottom of the viewport, where the cursor moves downwards so it can focus the buttons at the bottom edge.
Screen Actions
There is one screen action specific to the virtual cursor which is provided:
MoveVirtualCursor(id, x, y, duration=0, warper=None)
An action which moves the virtual cursor to a specific location, relative to the size of the virtual cursor area. If the preferences.mouse_move preference is False, this will do nothing (see: preferences.mouse_move). Note that this does not move the mouse cursor – that is, the mouse cursor used on a computer. It only moves the virtual cursor. See the MouseMove action for moving the computer mouse cursor.
id
The ID of the virtual cursor.
x, y
The x and y positions to move the cursor to.
duration
How long it takes to move to the new position. 0 by default (instant).
warper
The warper to use for the movement. Can be a string like "linear", in which case it must be the name of one of the built-in warpers (see https://www.renpy.org/doc/html/transforms.html#warpers). Otherwise, it can be a callable which will be passed a value between 0.0 and 1.0 and is expected to return a float. Default value is "ease".
e.g. action MoveVirtualCursor("my_vcursor", 100, 200, 0.5, "linear")